
Wood might seem like a straightforward surface, but it has a personality—grain patterns, pores, and quirks that react differently depending on how you treat it. Whether you’re staining a deck or refreshing cabinets, how you prep and apply stain determines whether the finish ends up smooth and rich or blotchy and uneven.
Surface Abrasion Techniques for Optimal Absorption
Getting stain to soak into wood evenly starts with how you sand it. Not all sanding techniques are created equal. If you sand too smooth, the stain won’t penetrate deeply. If you don’t sand enough, the surface remains rough and uneven. The trick lies in using medium-grit sandpaper—typically 120 or 150 grit—to open up the pores without sealing them off. Think of it like prepping skin before moisturizer; a little texture helps everything absorb better.
A second round of light sanding just before staining can further enhance how the wood takes in pigment. This isn’t about heavy-duty sanding but more of a gentle scuffing. Use a sanding sponge or orbital sander with a soft touch. This creates a consistent surface, which makes for a much cleaner, even finish once the stain hits the wood. For big projects like fence staining or deck work, this approach saves you from costly do-overs.

Ensuring Uniformity with Solvent-Based Pre-Stains
Wood, especially softer types like pine, tends to absorb stain unevenly. That’s where pre-stain conditioners come into play. Solvent-based pre-stains soak into the surface and help regulate how the stain will penetrate. It levels the playing field, preventing blotches and dark patches, particularly on intricate grains or high-contrast wood.
The key is applying the pre-stain evenly and giving it enough time to work—usually around 10 to 15 minutes—before wiping off any excess and adding your chosen stain. This short wait time makes a big difference in the final appearance. It’s one of those steps that feels skippable until you see the difference it makes. If you’re working on cabinet refinishing or indoor woodwork, a good pre-stain gives a more polished, high-end look.
Grain Raising and Smoothing for Premium Results
Water-based products can raise the grain of the wood, especially after sanding. What happens is the fibers swell, and the once-smooth surface turns fuzzy. To avoid this surprise, you can pre-raise the grain on purpose. Wipe the wood lightly with a damp cloth, let it dry, then sand it down again. This flattens the raised fibers so they don’t pop up after staining.
That second sanding may feel like extra work, but it pays off with a smoother finish and fewer touch-ups later. For projects like interior trim or fine furniture, that attention to detail separates the average DIY from a professional-grade outcome. It’s like ironing your clothes before an event—it shows you cared enough to get it right.
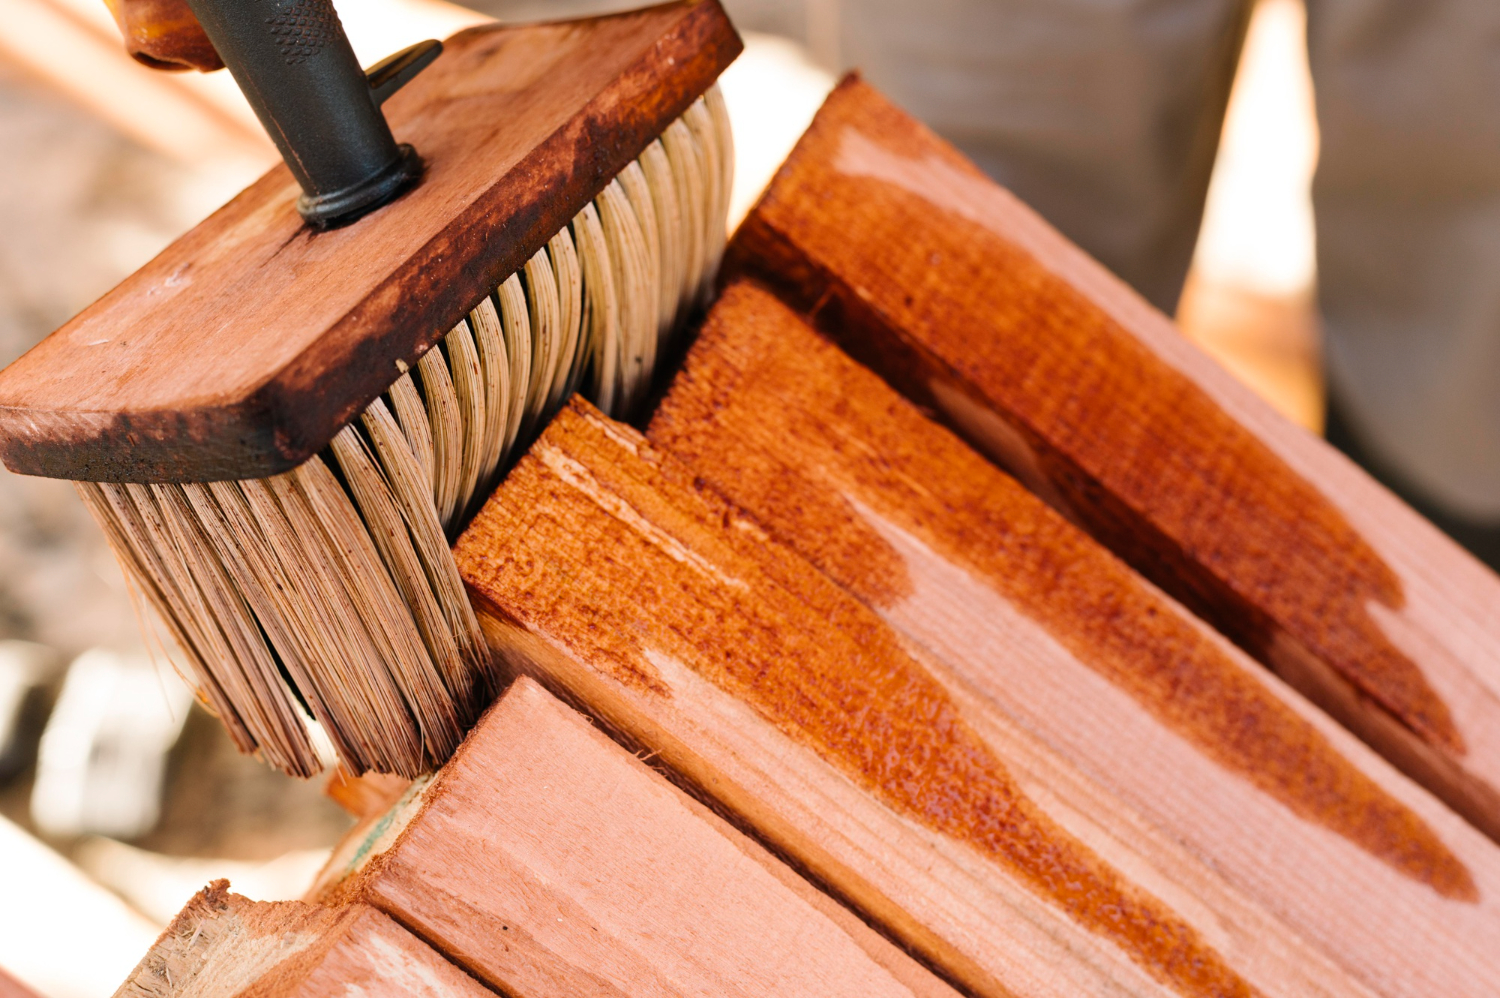
Pigment Penetration through Controlled Application Methods
How you apply the stain matters just as much as what kind you use. Rag-wiping, brushing, or spraying each offer different results, but rag application is often the most reliable for control. It forces the stain into the wood’s pores and allows you to adjust pressure and movement for consistent coverage. Brushing can leave lines if not followed with a wipe-down, and spraying is best left for pros with proper gear.
Apply stain with the grain using slow, even strokes. Let it sit for a few minutes, then wipe off the excess in the same direction. Rushing this step can cause streaks or uneven color patches. Whether you’re tackling commercial wood fixtures or a residential banister, that methodical touch makes the finish pop without blotchiness.
Tack Cloth Usage to Eliminate Residual Debris
Even the cleanest workshop has dust. After sanding, tiny particles settle into the surface. Regular cloths or brushes won’t always catch them—and staining over dust can ruin the whole job. A tack cloth, slightly sticky and designed for this exact task, pulls every last bit of fine debris from the wood without leaving behind residue.
Gently wipe the entire surface after your final sanding and right before applying pre-stain or stain. Fold the cloth as you go, using fresh sections so you’re not just smearing dust back onto the surface. It’s a tiny step with a big impact, especially on interior wood features like cabinetry or trim, where clarity and smoothness really show.
Wet-on-Wet Application for Enhanced Colour Depth
Most people stain, wait, then add more stain if it’s too light. But there’s a trick known as wet-on-wet staining that can deepen color quickly and beautifully. You apply a second coat while the first is still wet, layering pigment for a richer, more dynamic look. It’s a favorite technique for darker finishes on hardwood or pieces meant to stand out.
Timing is everything. Wait too long between coats and you’ll create streaks; apply too soon and you risk pulling up pigment. The sweet spot is around 5–10 minutes after the first coat. This method takes a little finesse but gives that deep, hand-rubbed finish people often associate with high-end woodwork. Use it wisely on pieces that deserve that standout detail—like railings, tabletops, or decorative trim.
Post-Stain Buffing for Professional-Grade Finishes
Once stain dries, most folks jump straight to sealant. But there’s one more step that takes your work from good to outstanding: post-stain buffing. Using a fine synthetic pad or super-fine steel wool (0000 grade), gently rub the surface to smooth out grain fuzz and lift any excess pigment. This gives the wood a soft sheen and even texture before you topcoat.
It doesn’t take long—just a quick pass over the surface—and it improves both the look and feel of the finish. Buffing also helps adhesion for whatever topcoat you apply next, whether it’s poly, lacquer, or oil. It’s the detail that furniture makers and pro painters swear by, and once you’ve done it once, you’ll never skip it again.
Bring Your Wood Surfaces to Life with Even Better Painting for Decks, Cabinets, Fences, and More
You’ve just read through the real ways to make wood finishing not just effective, but impressive. Now imagine these techniques done by seasoned hands—painters who treat each surface like our own. Whether it’s the cabinetry in your kitchen or the deck in your backyard, the pros at Even Better Painting use these exact steps (and then some) to give wood surfaces a lasting, beautiful finish. We don’t cut corners, and we don’t rush the process. Every brushstroke shows precision, and every surface tells a story of quality.
Even Better Painting offers a full range of interior and exterior painting services across residential, commercial, and strata properties. Our team specializes in everything from cabinet refinishing to deck and fence staining—bringing out the best in every space they touch. If you want rich colors, smooth textures, and results that feel as good as they look, you don’t need to figure it all out alone. Contact us today and let’s bring your wood surfaces back to life—with care, skill, and the finish they truly deserve.


